Are your windows letting in chilly drafts, refusing to budge, or just looking like they’ve seen better days? If you’ve been tossing around the idea of upgrading, switching to vinyl windows could be one of the smartest decisions for your home. And no, it’s not just about giving your house a facelift—though they do boost curb appeal. Vinyl window installation can seriously improve your home’s energy efficiency, enhance indoor comfort, and even bump up your resale value.
In this guide, we’re breaking down everything you need to know about installing vinyl replacement windows—in plain English. We’ll cover the essential tools you’ll want on hand, walk through each step of the installation process, and flag some common mistakes you’ll definitely want to avoid. Whether you’re a hands-on DIY type who loves a weekend project or you’re thinking about hiring a pro, this guide will help you go into your vinyl window upgrade with confidence. Let’s get started and make sure your next view through the window is a whole lot better.
Why Vinyl Windows Are a Smart Upgrade?
Before we jump into the “how,” let’s quickly talk about why vinyl windows have become the go-to for so many homeowners.
Here’s why vinyl replacement windows are so popular:
- Affordable: Lower upfront cost compared to wood or fiberglass.
- Low-maintenance: No painting or staining required—ever.
- Energy-efficient: Great insulation keeps your utility bills low.
- Durable: Won’t warp, rot, or fade over time.
- Stylish: Available in various colors, styles, and finishes.
Vinyl window frames are made from polyvinyl chloride (PVC), which makes them weather-resistant, lightweight, and long-lasting—perfect for any climate.
Planning Your Vinyl Window Installation
Whether you’re replacing one old window or every unit in your house, planning is critical.
Start with the following checklist:
- Measure your current window openings carefully (width and height).
- Choose the style (single-hung, double-hung, sliding, etc.).
- Decide if you want full-frame or insert replacements.
- Gather tools and materials before you begin.
- Check local codes or HOA requirements.
If all this feels overwhelming, don’t worry. You can always trust the experts at General Construction RI. They offer professional window installation services you can rely on—guaranteed to get it right the first time.
Tools You’ll Need to Install a Vinyl Window

Credit: comoexteriors.com
If you’re the DIY type, make sure you have these tools handy before you start installing your vinyl replacement windows.
Basic tools for window installation:
- Pry bar or crowbar
- Hammer or drill
- Tape measure
- Utility knife
- Level
- Screwdriver
- Caulking gun
- Expanding foam or insulation
- Flashing tape
- Safety goggles and gloves
How to Install a Vinyl Replacement Window: Step-by-Step

Let’s get into the details. Installing vinyl windows doesn’t have to be intimidating when you break it down into manageable steps.
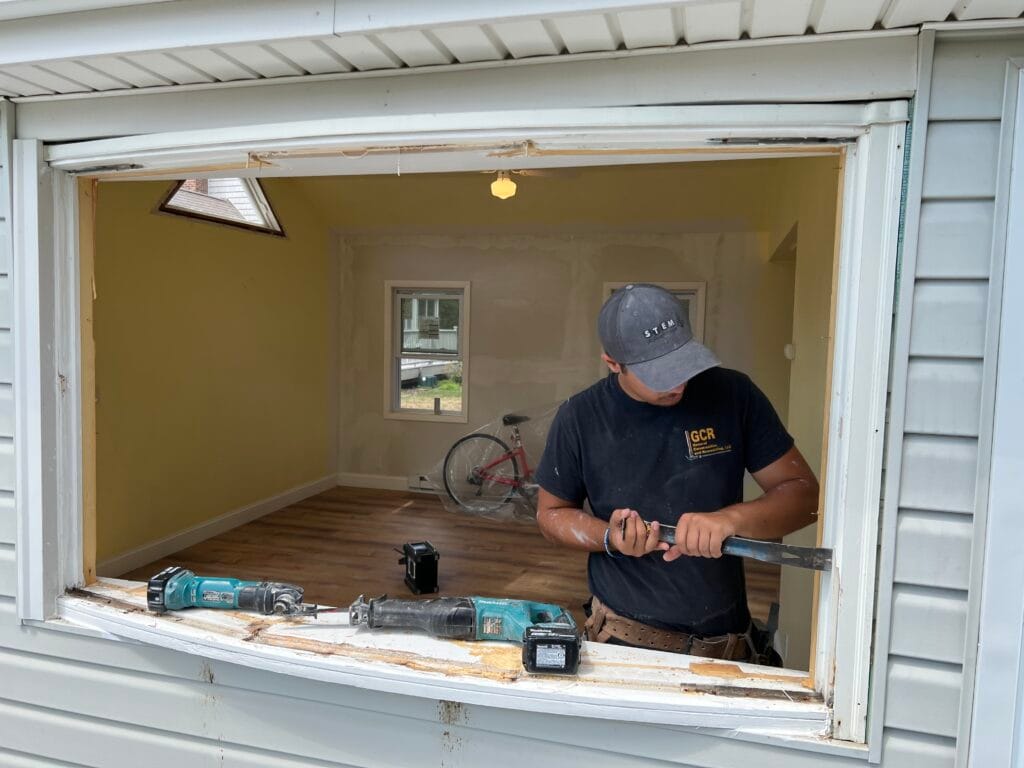
Remove the Old Window
This is your starting point. Use a utility knife to cut any paint or caulk sealing the old frame. Then, carefully use your pry bar to remove the window sash and frame.
Pro tip: Wear gloves and eye protection—there may be nails or broken glass.
Inspect and Clean the Opening
After removing the old window, inspect the rough opening. Check the window frames for rot or water damage. Clean out old nails, debris, and dust.
- Replace any damaged wood
- Make sure the opening is square
- Use shims to adjust as needed
Dry-Fit Your New Vinyl Window
Before applying caulk or screws, do a quick dry-fit. Insert the vinyl window into the opening to ensure it fits snugly.
- Use a level to check alignment
- Adjust with shims to eliminate gaps
- Double-check that the sash opens and closes smoothly
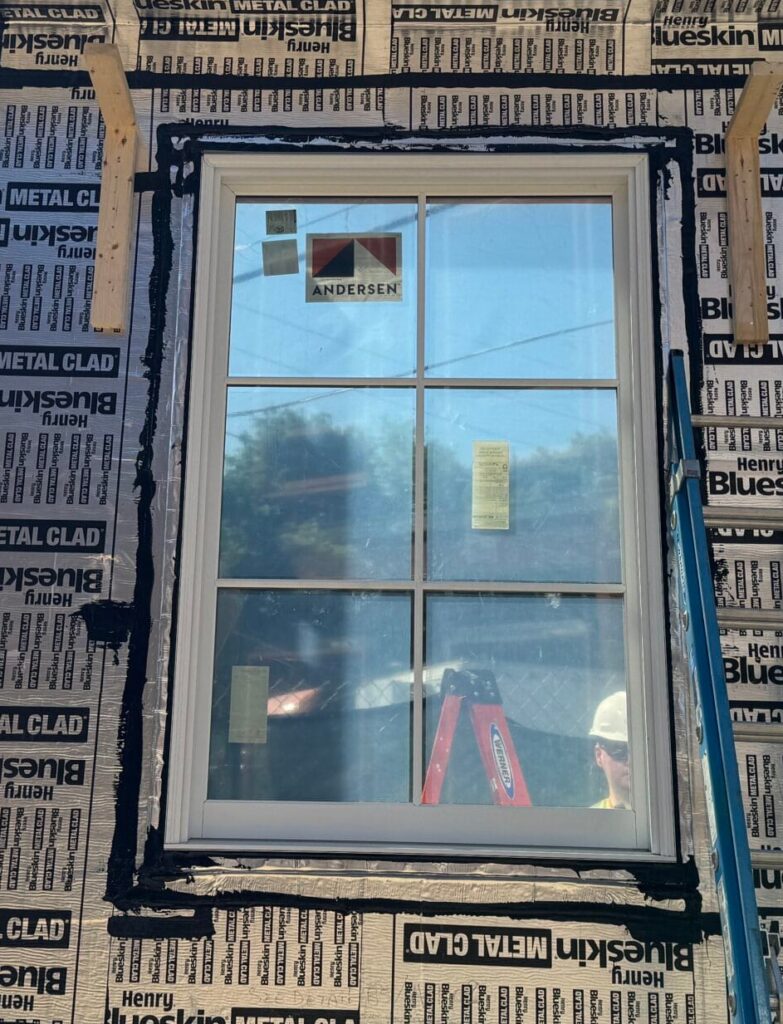
Apply Caulk and Insert the Window
Now that the vinyl window fits, apply a bead of exterior-grade caulk around the perimeter of the opening. Carefully slide the window into place, pressing it firmly against the caulk.
- Insert shims along the sides and bottom for a secure fit
- Use your level again to confirm it’s plumb and square
Secure the Window
Drive screws through the window’s mounting flanges into the framing. Be careful not to overtighten, which can warp the frame.
- Check the sash again to ensure smooth operation
- Add more shims if the window shifts during fastening
Insulate and Seal
Use low-expansion spray foam or fiberglass insulation to seal any gaps between the window and the frame.
- Avoid overfilling, which could bow the frame
- Let the insulation cure before trimming any excess
Add Trim and Flashing
Finish off your window with interior and exterior trim. Apply flashing tape or sealant to prevent water from getting into the wall cavity.
- Paint or stain if desired
- Clean the glass and admire your work!
Common Mistakes to Avoid

Credit: bobvila.com
Even the most confident DIYers can run into problems. Here are a few to avoid:
- Not measuring properly: Measure multiple times to ensure accuracy.
- Skipping insulation: Gaps around the frame = energy loss.
- Over-tightening screws: This can damage the vinyl window frame.
- Not checking for rot: Old water damage can ruin your new installation.
If you’re unsure or the job feels too big, don’t risk it. General Construction RI offers guaranteed vinyl window installation—a reliable safety net if DIY doesn’t pan out.
When to Replace Your Vinyl Windows?
You might not always need to replace the entire window. Sometimes, you can just replace a window sash or repair minor issues. But full vinyl replacement window installation is the better route when:
- Windows are drafty or foggy
- You feel temperature changes near the glass
- Sashes stick, warp, or won’t stay open
- You see visible rot, mold, or water damage
- Your energy bills have been creeping up
How Long Does It Take to Install a Vinyl Window?

Credit: riserenovation.com
If you’re handy, installing a vinyl window might take just 2–3 hours per window. If you’re replacing multiple units or the job requires extra work (like replacing frames), plan for more time.
Want to install your vinyl window faster with zero hassle? Call in the pros. General Construction RI handles everything from measurements to cleanup—efficient, professional, and guaranteed.
Vinyl Window Installation Cost
The cost to install vinyl windows can vary widely based on several key factors. Understanding these variables can help you plan your project and budget effectively.
Key Cost Factors:
- Window Size and Style: Larger or custom-shaped windows typically cost more than standard double-hung or casement styles.
- Full-Frame vs. Insert Installation: Full-frame installation involves replacing the entire window frame, which is more labor-intensive and expensive than an insert installation that fits new windows into existing frames.
- Number of Windows: The more windows you need to replace, the higher your total cost—but bulk installation may reduce the per-unit price.
- Labor Rates in Your Area: Installation costs vary based on local labor rates and the contractor’s expertise.
Average Pricing
Homeowners can expect to pay between $300 and $700 per window, including materials and professional installation. High-end or custom projects may exceed this range, while basic installations might cost less.
For a more accurate estimate, General Construction RI offers transparent, affordable quotes tailored to your home’s specific needs. Their team ensures top-notch service and competitive pricing to fit a range of budgets.
Maintenance Tips for Vinyl Windows
Your new windows are in—now let’s keep them in great shape.
Quick Maintenance Checklist:
- Clean frames and glass regularly with mild soap and water.
- Lubricate tracks and hinges every six months.
- Inspect caulking annually and reapply if cracked or missing.
- Avoid using abrasive cleaners that can scratch or damage the frame.
With minimal upkeep, your vinyl windows can last 20–40 years.
Wrap Up
Installing vinyl windows is one of the smartest home upgrades you can make. They improve curb appeal, boost energy efficiency, and offer excellent value. Whether you DIY the job or call in the pros, a well-installed vinyl window enhances both comfort and resale value.
HERE’S TO A HAPPY VINYL WINDOW INSTALLATION!
Need help choosing window styles? Curious about energy ratings? Or just want a professional touch from the start? Click over to General Construction RI’s services page and take the first step toward brighter, better windows.
FAQs
Can I install vinyl windows over old frames?
Yes, with insert windows. But inspect the old frame to ensure it’s level and damage-free.
Do vinyl windows reduce noise?
Absolutely. Many vinyl windows have multi-pane glass that insulates against both heat and sound.
Are vinyl windows customizable?
Totally! You can choose from a variety of finishes, grid styles, and hardware options.
Is it worth hiring a contractor?
If you’re short on time, lack tools, or want guaranteed results, yes. Start with trusted professionals like General Construction RI.